|
Procedure for Uploading Profile Pages
Today you will be uploading your NRM Profile page to your personal directory on the University's web server, making your page "live" on the Web for all to see. There are three main steps to this
process, none of which is exceedingly complicated. First, you must preview your Profile page in
the Netscape browser window, to make sure there aren't any obvious problems. Then you'll
create a Web directory on the UVA server. Finally, you'll use an FTP (File Transfer Protocol)
program to upload your profile page from your floppy disk to the Web directory you've just
created. Sound straightforward? It is. The instructors will not be doing much talking this
session, but will instead be circulating to trouble-shoot any problems you may encounter.
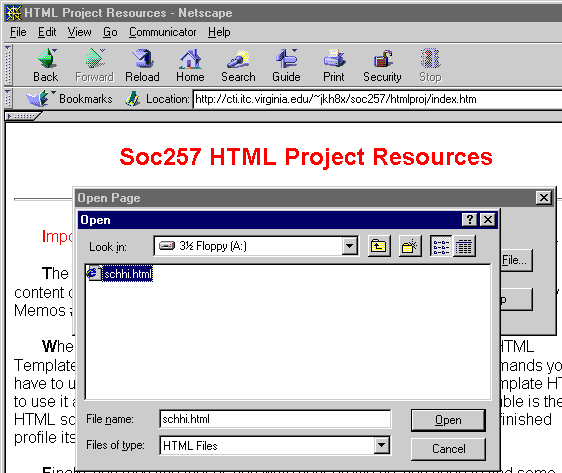
- First, you should double-check how your profile page will appear
when it is live on the Web by launching the Netscape browser (its icon is on the
Windows desktop). When Netscape has loaded, click on "Open Page" in the file menu.
From the "Open Page" dialog box, click the "Choose File" button
and select your Profile page file from your floppy disk as indicated in the below image.
What appears in the browser window is what your completed NRM Profile document will
look like when it is "live" on the Web. If there appear to be any problems, ask an instructor for
assistance.
- Provided there aren't any visible problems with your page,
you now need to upload your Profile page file to your Unix account. First, you need to
create a public_html directory on your Unix account.
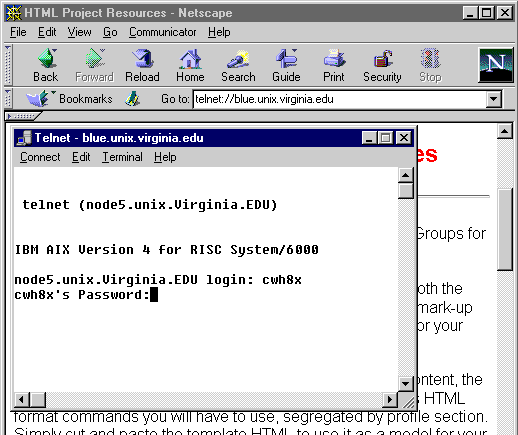
In your Netscape browser window, type the following:
telnet://blue.unix.virginia.edu
Note that the blue.unix.virginia.edu server is only for CLAS students. Engineering school students,
Education School students, and miscellaneous others may have accounts created on other servers.
In that case, the procedure will be the same, but the server you will need to telnet and FTP to will
be different. Log in with your username and password in the Telnet dialog box which appears. NOTE:
if you have not set up a UNIX account with ITC, you will most likely not be able to log
in to your UNIX account to complete this step. If your username and password do not work,
simply inform the instructor, get up, and go to the ITC Help Desk on the 200-floor of Wilson
Hall. They will get you set up with a UNIX account in no time, after which you can complete
the process described below.
Provided you have set up a UNIX account properly, once you enter your username and password
you should be in the UVA Unix Menu system. At the prompt, type 6 and hit Enter.
Then, from the System Customization menu, type 11 and hit Enter. You
have now set up a public_html directory on your Unix account (your account is ready
to host a homepage. Hit m, Enter then x, Enter to log out of
your UNIX account. Click the X in the upper righthand corner of the Telnet window to close the
Telnet program.
- Now, look on the Windows Desktop for an icon entitled "FTP" or "WS-FTP."
Double-click this icon and the File Transfer Protocol program will
launch.
In the dialog box which appears, you
should enter your Unix server name (blue.unix.virginia.edu), your username, and password in the
fields provided. Then, hit enter.

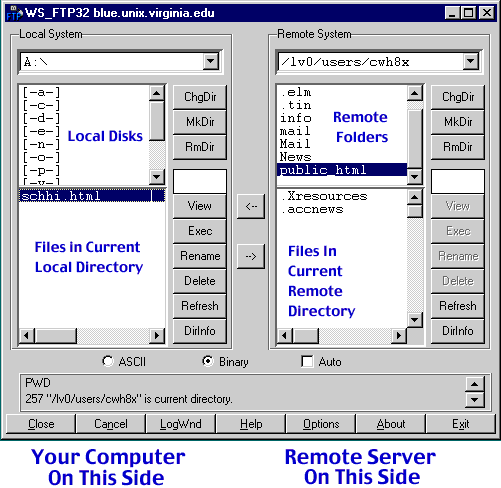
- You have now opened up an FTP (File Transfer) connection to your Unix account.
VERY IMPORTANT: the left side of the WS-FTP program window represents your local
computer. The right-side windows represent the remote server to which you will be uploading your
Profile page HTML file. The top window on each side displays available folders, and the bottom window
displays files present in the current folder (look at the illustration below).
On the top, right-side window in the FTP program, you should see a folder entitled "public_html" as in the image below.
Double-click on this folder to enter it. DO NOT UPLOAD YOUR PROFILE PAGE HTML FILE OUTSIDE THIS "public_html"
DIRECTORY AS IT WILL NOT BE ACCESSIBLE FROM THE WEB.
You are now inside your Public HTML directory. Every file you upload to this directory
can be viewed by anyone on the World Wide Web. On the left-hand side of the FTP program window,
select the A: drive
and double-click on your Profile page HTML file in the box below. Note that this file MUST be named in the format
"profilename.html" or it won't be recognized by Web browsers as an HTML file (the .html
file suffix is crucial). Once you double-click on your Profile page HTML file it will be transferred
to your public_html directory. You should see it appear in the lower, right-hand FTP window, indicating
that it has been successfully transferred. If not, try again or ask an instructor for assistance.
- Open up Netscape and make sure your file was transferred. Type in the new Web address
of your Profile page (where the capitalized words are replaced with your particular info):
http://www.people.virginia.edu/~YOUR USERNAME/PAGENAME.html
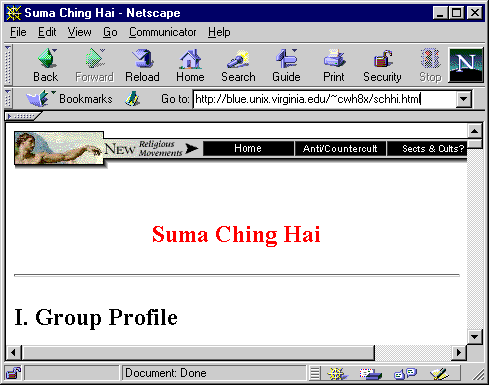
- If your home page does not appear at this address, ask an instructor for assistance. Otherwise,
you are finished - you have uploaded your Profile page to your public_html directory
and made it accessible to anyone on the World Wide Web!
If you'd like further information about the mechanics of HTML code
and the art of sculpting web pages which are more than flat lists of
text, click here.
This link will take you to the Electronic Text Center's HTML tutorial.
|


